Browse products by medical specialities area or therapies
Product by Therapies
Product by Type
Product by Therapies
Product by Type
Arthroplasty
Product by Therapies
Product by Type
Sports Medicine
Product by Therapies
Knee Portfolio - ACL /PCL Reconstruction
Knee Portfolio - Meniscus Repair
Shoulder Portfolio - Bankart/Slap Repair
Shoulder Portfolio - Rotator Cuff Repair
Product by Type
Choosing the correct Heparin Tubes can determine whether a specimen produces dependable plasma or requires recollection. In a busy laboratory, that decision affects workflow, turnaround time, and result confidence. Tube color alone is not enough. Heparin type, concentration, volume, and intended test must also match the laboratory method.
A green-top tube may contain lithium heparin, sodium heparin, or another formulation. These additives are not interchangeable for every application. Lithium heparin is commonly selected for many plasma chemistry tests, while sodium heparin may be unsuitable when sodium measurement is clinically important. Some specialized assays require manufacturer-specific materials. Small differences matter.
Look closely at the label.
Practical selection begins with the test menu and the analyzer’s requirements. Review the test instructions, specimen matrix, minimum volume, mixing guidance, and processing time. Confirm that the tube supports the required plasma type and does not introduce an interfering substance. The correct fill volume also matters, especially when blood-to-additive ratios affect performance.
Reliable laboratories validate new tube lots before routine use. They compare results against an established collection system and document acceptance criteria. Storage conditions, expiration dates, centrifugation settings, and transport temperature deserve equal attention. Even careful procedures can fail when a tube is underfilled, shaken sharply, or processed too late.
There is no universal tube choice.
This guide examines the practical factors behind Heparin Tubes selection. It also considers common mistakes, supplier documentation, quality control, and the limits of general recommendations. Local procedures and validated manufacturer instructions should remain the final reference.
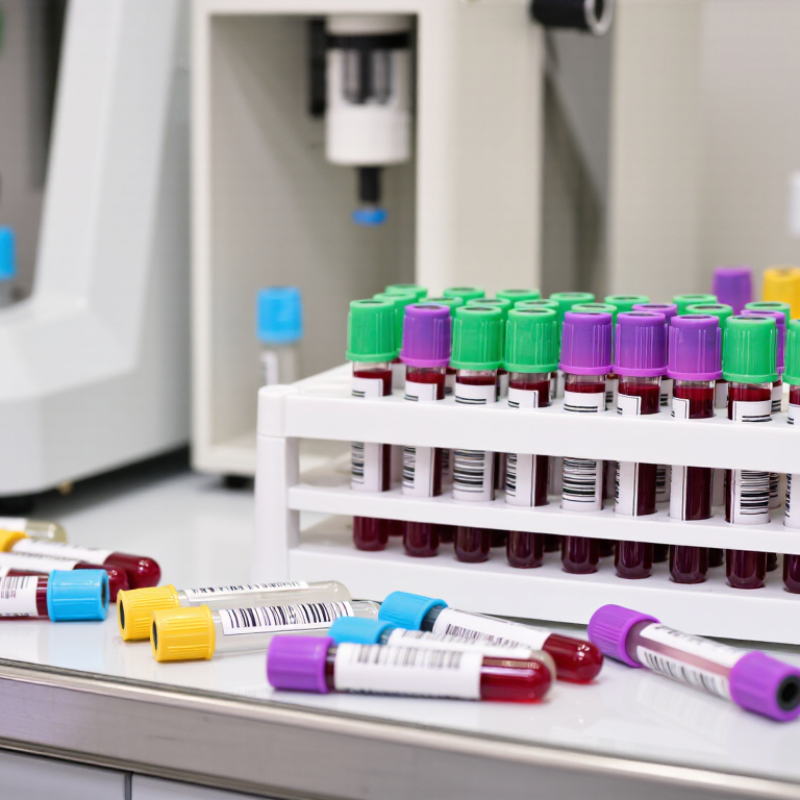
How to Choose the Right Heparin Tubes for Your Lab?
Plasma testing needs should guide every heparin tube decision. CLSI GP41 emphasizes controlled venous collection, correct tube identification, adequate filling, and prompt specimen handling. Lithium heparin tubes commonly support many chemistry tests, while sodium heparin may suit selected procedures. The choice still depends on the test method and laboratory validation. Heparin concentration, tube material, separator design, and possible additive interference can affect results. A tube that works well for electrolytes may not be suitable for trace measurements or specialized assays. Small details matter.
In daily laboratory work, review the test menu before ordering collection tubes. Check whether the method requires plasma, whole blood, or serum. Confirm the acceptable anticoagulant with the assay instructions and local procedure. Follow the recommended blood-to-additive ratio, gently invert the tube, and avoid vigorous shaking. Inspect samples for clots, hemolysis, underfilling, and delayed separation. Document collection time and processing conditions when stability is limited. One point deserves reflection: a familiar tube is not automatically the correct tube. I have seen routine habits outlast updated validation data.
Tips: Build a tube-selection table for each assay. Include specimen type, anticoagulant, minimum volume, mixing steps, centrifugation conditions, and stability limits. Train staff with real specimens and clear photographs. Recheck the table after method changes, instrument updates, or unexpected quality-control trends. When evidence is unclear, pause and consult the laboratory director, method insert, and current CLSI guidance. Testing assumptions can be wrong. That is useful to remember.
Define plasma testing needs using CLSI GP41 requirements. The chart shows common first-choice applications for major heparinized plasma tube types. A value of 1 indicates common use for that testing area; 0 indicates that the tube is generally not the first-choice specimen. Always verify the test system and tube instructions before implementation.
Use lithium heparin plasma primarily for routine chemistry and electrolyte testing. Sodium heparin is commonly selected when sodium interference must be avoided or for certain specialized applications. Balanced heparin is commonly preferred for blood gas and ionized calcium testing because it helps reduce anticoagulant-related measurement bias. CLSI GP41 emphasizes correct tube selection, adequate filling, immediate mixing, and proper transport conditions.
Select lithium or sodium heparin according to the analyte and its interference risk. Lithium heparin is widely used for routine plasma chemistry because it usually adds little sodium-related bias. However, it should not be selected for lithium measurement. The tube can raise the measured result. Small errors matter.
Sodium heparin may be suitable when lithium contamination could affect interpretation. Yet it introduces extra sodium into the specimen. That can matter when sodium is the target analyte or when results sit near a clinical decision limit. In practical testing, a few unexpected numbers can begin with the tube, not the analyzer. Read the method.
Review the assay instructions, specimen requirements, and validation data before changing tube types. Check whether the method was tested with lithium or sodium heparin plasma. Confirm the tube is filled correctly, mixed gently, and processed within the required time. Underfilled tubes may alter the blood-to-heparin ratio. Delayed separation can create additional bias.
I have seen laboratories treat all green-top tubes as interchangeable. That shortcut can fail. A tube choice that works for electrolytes may not suit trace elements, drug monitoring, or specialized chemistry. Compare paired specimens during verification, examine bias across concentrations, and record the decision in the procedure. Document the choice.
How to Choose the Right Heparin Tubes for Your Lab?
Choosing a heparin tube starts with the required specimen volume. Check the nominal fill volume, not just the tube size. A tube marked for 4 mL should receive the volume specified in its instructions. Underfilling changes the blood-to-additive ratio. That change can affect plasma quality and test performance.
ISO 6710 provides a useful framework for single-use blood collection containers. Confirm that the tube documentation states conformity with ISO 6710. Then review the additive type, additive level, intended specimen, and fill range. Lithium heparin and sodium heparin are not interchangeable for every workflow. Match the additive to your validated chemistry or plasma testing method. Small details matter.
Look closely at the fill line. A partially filled tube may seem acceptable during a busy collection period, but it can create avoidable variation. I have seen teams focus on tube color and overlook the additive concentration. That is an easy mistake. Also check whether the tube requires gentle inversion after collection. Excessive mixing can cause hemolysis, while insufficient mixing may leave microclots. Review rejection data regularly. If many samples arrive underfilled, the problem may involve tube selection, collection technique, or patient access. The solution is not always obvious. Document your decision using the manufacturer’s instructions, internal validation results, and current ISO 6710 requirements.
Heparin tubes support many plasma-based chemistry and immunology tests. Tube selection should match the analyzer, specimen volume, and laboratory procedure. CLSI GP41 and the WHO Guidelines on Drawing Blood recommend 8–10 gentle inversions for heparin specimens. This action distributes the anticoagulant without creating excessive foam or cellular damage.
Invert immediately after collection. Do not shake the tube. A practical motion looks like a slow wrist turn, with the tube moving end over end. Under-mixing can leave tiny clots near the tube wall. Over-mixing may increase hemolysis risk. A professional review published in Clinical Chemistry and Laboratory Medicine reports that preanalytical problems may represent up to 70% of laboratory errors. That figure is difficult to ignore.
Tips: Count the inversions aloud during busy draws. Keep the tube upright afterward. Check the local test manual, because requirements can differ. Inspect the plasma for visible hemolysis, fibrin, or unusual color before analysis. Record collection problems rather than quietly accepting them. This is where practice gets imperfect. Staff may count differently, especially during difficult collections. Periodic observation and competency checks can expose that gap. WHO also stresses prompt, standardized handling from collection through transport. Timing matters. Store and transport specimens according to validated laboratory procedures.
Validate Centrifugation, Transport, and QC Under CLSI GP44
Choosing a heparin tube starts with the test menu, not the tube label. Lithium heparin plasma suits many routine chemistry tests. Sodium heparin may fit specialized applications, but compatibility must be confirmed. Gel separators can improve workflow, yet they may interfere with selected analytes or instruments. Review the tube instructions, specimen requirements, and local method limitations together.
CLSI GP44 supports a controlled approach to specimen handling. Validate the centrifugation time, speed, and temperature using your laboratory’s actual equipment. A small rotor change can alter plasma recovery. Record the centrifuge model and braking setting. During transport, assess delays, temperature exposure, vibration, and tube orientation. Test realistic conditions, not only ideal bench samples. We once found acceptable results after immediate processing, but unexpected potassium shifts after delayed transport.
Quality control should include paired patient specimens, precision checks, and bias assessment. Compare results from the candidate tube against your current validated process. Examine hemolysis, fibrin, volume, and plasma appearance. Define acceptance limits before testing begins. Include difficult samples, because clean specimens can hide practical failures. Recheck performance after changing centrifuges, transport routes, or analytical systems. A validation file should show who performed each step, which conditions were used, and why the final decision was accepted. Local verification remains essential. No general recommendation replaces evidence from your own laboratory.