7 Tips for Choosing All Suture Anchor Technology?
Choosing All-suture anchor technology requires more than comparing package labels or pullout-strength numbers. The right device must match the tissue, bone quality, repair pattern, and surgeon’s technique. In a small shoulder footprint, for example, anchor diameter, suture handling, and insertion angle can change the final construct. Tiny differences matter.
Orthopedic shoulder specialist Dr. Augustus A. Mazzocca has emphasized a practical principle: “Choose the anchor that matches the anatomy, the biology, and the repair—not the trend.” That idea guides this introduction to seven useful selection tips. Each tip examines a real decision, from deployment and knot management to MRI visibility, revision planning, and cost. Evidence matters. So does the surgeon’s experience with a specific system.
Laboratory strength is not the whole story. A high-strength result may not predict performance in soft, osteoporotic, or irregular bone. Clinical studies can also differ in design, follow-up, and patient selection. That deserves caution. Manufacturers’ instructions, peer-reviewed evidence, and local regulatory requirements should be reviewed before clinical use. No anchor eliminates biological failure, technical error, or rehabilitation challenges.
The goal is not to identify one universally superior product. It is to build a disciplined comparison process. Look closely at the drill guide, insertion feedback, suture configuration, and removal options. Consider what happens when the first placement is imperfect. That moment is often ignored. These seven tips offer a practical framework for choosing All-suture anchor technology with clearer judgment, realistic expectations, and respect for patient-specific anatomy.
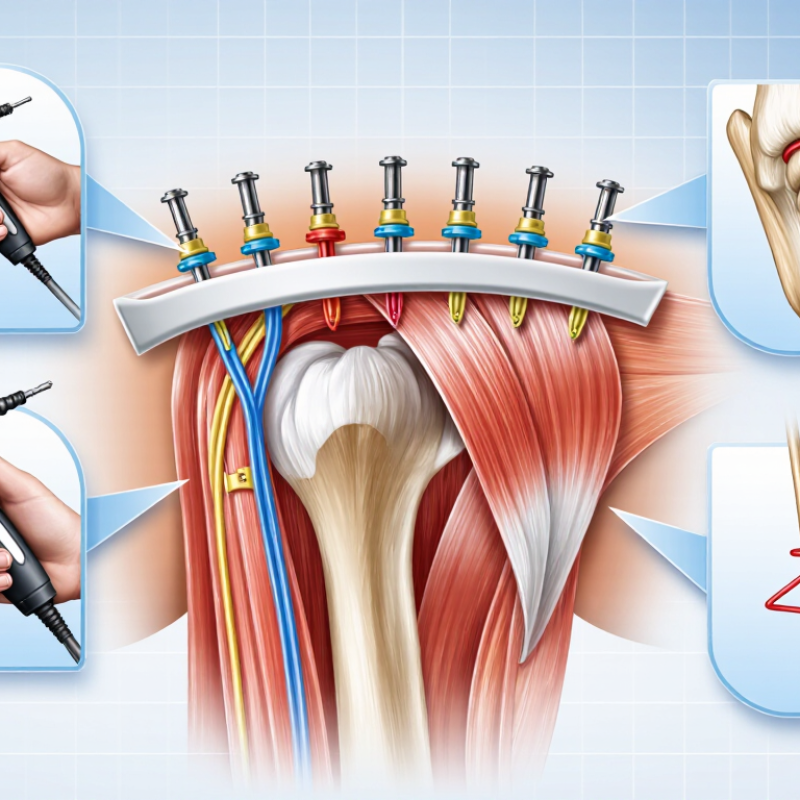
Understanding All-Suture Anchor Technology and Its Main Uses
7 Tips for Choosing All-Suture Anchor Technology
Understanding all-suture anchor technology starts with its structure. A soft anchor uses high-strength suture instead of a rigid body. This may reduce bone removal and leave a smaller implant footprint. Grand View Research’s 2024 sports medicine report valued the global market at approximately US$8.9 billion in 2023. Growth reflects rising demand for less invasive orthopedic procedures, but market growth does not prove clinical superiority.
Assess seven practical points before selection: fixation strength, deployment method, suture handling, bone quality, load direction, imaging compatibility, and surgeon training. In softer bone, anchor expansion and cortical purchase deserve close attention. A small drill hole is useful. It is not automatically safer. Arthroscopic repairs also depend on tissue quality, knot security, and rehabilitation, not only anchor design. The American Academy of Orthopaedic Surgeons emphasizes patient-specific planning in its clinical guidance.
Look closely at pullout testing, cyclic loading data, and clinical follow-up periods. Laboratory results can change with bone density, insertion angle, and testing setup. Ask whether the evidence matches the intended repair, such as labral, rotator cuff, or ligament fixation. MRI information matters too, especially when future imaging is likely. Read the instructions carefully. Deployment errors remain possible, even with experienced teams. I would also question unusually impressive claims when independent studies are limited; evidence gaps are easy to overlook in fast-moving device categories.
Assessing Bone Quality, Anatomy, and Repair Requirements
Choosing all-suture anchor technology starts with assessing bone quality, not selecting a device by size alone. Dense cortical bone may provide reliable purchase. Osteoporotic, cystic, or previously drilled bone requires greater caution. Review radiographs and advanced imaging when clinically indicated. Intraoperative tactile feedback also matters. Feel the drill path. A smaller anchor may preserve bone, but it can offer less tolerance for poor placement or excessive tension.
Anatomy shapes the decision. Identify the repair footprint, cartilage margin, tendon path, and nearby neurovascular structures. Consider the insertion angle and available working space before drilling. Measure twice. Avoid placing an anchor where bone is thin or the angle forces unnecessary cortical damage. The intended repair should guide anchor position, spacing, and suture direction. Every shoulder, hip, or foot has different constraints.
Repair requirements deserve equal attention. Evaluate tear size, tissue quality, retraction, expected load, and rehabilitation demands. Strong tissue may support a simple configuration, while fragile tissue may need broader compression and load sharing. Do not treat every repair alike. Even experienced teams can misjudge bone strength during a fast procedure. That limitation deserves honest planning. Use current evidence, validated surgical guidance, and patient-specific judgment. A checklist helps, but it cannot replace careful anatomical assessment.
7 Tips for Choosing All-Suture Anchor Technology
Assessing bone quality, anatomy, and repair requirements
The chart summarizes seven clinically relevant planning domains. Bone quality should be screened with patient history, imaging, and, when appropriate, DXA-based assessment. Lower bone density, thin cortical regions, limited working space, higher tissue loads, and more complex repairs generally require greater attention to anchor size, insertion angle, suture configuration, fixation depth, and load distribution. The priority scores are an educational planning scale rather than measured pullout-force data.
WHO DXA reference: a T-score from −1.0 to −2.5 indicates osteopenia, while a T-score of −2.5 or lower indicates osteoporosis. T-scores are only one part of local fixation assessment and do not replace anatomical or intraoperative evaluation.
Comparing Anchor Materials, Designs, and Fixation Strength
Choosing all-suture anchor technology requires more than comparing pullout numbers. The anchor material affects handling, imaging, and biological response. Braided high-strength sutures create a small implant footprint and leave less rigid material in bone. Rigid polymer or metal anchors may offer stronger initial purchase in dense bone, but they require larger drill holes. That difference matters near cartilage, narrow tuberosities, or revision sites. Smaller is not always better.
Design controls fixation behavior. Some all-suture anchors expand through a soft sleeve, while others rely on suture bunching or knotless tensioning. Deployment depth, insertion angle, and bone density can change performance quickly. A practical assessment should examine insertion feedback, suture abrasion, eyelet smoothness, and whether the anchor seats fully. Test cyclic loading, not only one straight pull. Real repairs experience repeated shoulder or hip movement.
Fixation strength also depends on the bone, repair pattern, and surgeon technique. A dense cortical layer may improve purchase, while weak cancellous bone can allow gradual migration. I would avoid treating one impressive laboratory value as a clinical guarantee. Even a small anchor can fail if tension is excessive or the tunnel is poorly prepared. Check manufacturer-independent testing when possible, and compare failure mode, displacement, and load retention. No design is perfect. Reflect on the entire repair, not the anchor alone.
Checking Surgical Compatibility and Handling Characteristics
Choosing all-suture anchor technology requires more than comparing implant size or packaging.
Surgical compatibility comes first.
Confirm the anchor matches the intended procedure, fixation site, bone quality, suture configuration, and available insertion instruments. Review the manufacturer’s instructions for use, MRI conditions, sterilization status, and approved indications.
Fit matters.
Handling characteristics can change the entire procedure.
Examine how the anchor loads, deploys, tensions, and seats inside the bone. The delivery needle should provide stable access without obstructing the arthroscopic view. Suture passage should feel controlled, with minimal memory, tangling, or slippage.
Small details matter.
Also test the instrument sequence during simulation or cadaveric training, not only in the operating room. A perfect checklist is unrealistic, but an untested workflow is worse.
Professional safety data supports careful documentation.
The FDA’s 2023 Medical Device Reporting data included more than two million reports across device categories, although these submissions cannot establish true failure rates. Record the selected anchor, lot number, insertion method, tissue quality, and any intraoperative difficulty. Compare these notes with peer-reviewed evidence and local outcomes. AAOS patient-safety guidance also emphasizes standardized communication, appropriate training, and verification before use.
Do not assume a smaller anchor is automatically less disruptive.
Pullout resistance, deployment depth, suture management, and surgeon familiarity must be assessed together.
Evaluating Clinical Evidence, Safety, Quality, and Cost
Choosing all-suture anchor technology requires more than trusting a familiar product shape. Clinical evidence should match the procedure, tissue quality, and patient activity. The 2023 AAOS Clinical Practice Guideline found limited evidence for several anchor-related shoulder decisions. That limitation matters. Tip: Check study design, follow-up length, revision rates, and patient-reported outcomes. Tip: Separate laboratory pullout strength from real clinical performance. Tip: Review safety signals in the FDA MAUDE database, but remember that reports do not establish complication rates.
Safety depends on technique as much as design. Small anchors may reduce bone removal, yet poor placement can cause migration, cartilage injury, or weak fixation. Tip: Confirm insertion depth, trajectory, and recommended drilling steps. Tip: Examine published failure patterns, not only successful case series. In my experience, operating-room simplicity can be valuable, but it may also hide a learning curve. Surgeon training records, imaging review, and standardized follow-up provide stronger assurance than marketing claims. The AAOS guideline also supports shared decision-making when evidence remains uncertain.
Quality evaluation should include sterilization controls, material traceability, packaging integrity, and manufacturing consistency. Tip: Request independent testing for strength, knot security, and cyclic loading. Tip: Compare suppliers using the same endpoints and time horizon. Tip: Calculate total cost, including instruments, operating time, revisions, and rehabilitation. Tip: Ask whether a lower purchase price creates extra training or monitoring costs. A 2024 health-economics review in orthopaedic surgery emphasized that device value depends on outcomes, complications, and resource use—not price alone. My own assessment would remain provisional until registry data and longer follow-up become available.